Legrand CRM is installed on desktop computers and stores data in a Microsoft SQL database on a server. The record data is stored in a Microsoft SQL database. Files such as document attachments, email templates, and word templates are stored in a separate shared folder also referred to as the ‘Legrand Common Folder’. Therefore, the complete data consists of the SQL database and Legrand Common Folder. Ensure you create a backup strategy for the SQL data and Common folder.
In addition, Legrand CRM uses Microsoft IIS to host Legrand CRM Web Edition and to host web services that communicate to the CRM database. If you intend to use the Web Edition to provide web access to your mobile teams, you need IIS 7.0 (or higher) enabled and securely configured on your server.
Legrand On-Premise CRM System Requirements
- Windows Server 2014 or higher. Windows Server Essentials is not supported.
- Microsoft SQL Server 2014 or later
- .NET Framework 4.5
- Microsoft IIS 7.0 for Web Edition
- Windows 7 or 10 for desktop computers
- A Gigabit network connection
- The Outlook Add-In is available for Outlook 2016 & higher
Contact your IT administrator to install and configure the SQL Server. If the SQL installation is poorly configured, you may have difficulties connecting to the SQL database.
The overall installation and set-up process
After you install and configure the SQL server, proceed to the following steps:
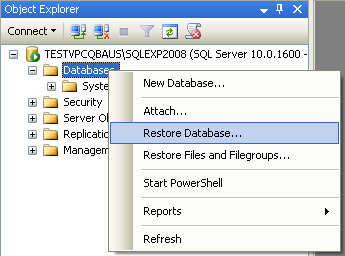
- Use ‘Restore database’ in the SQL Server Management Studio to create a new, mostly empty, database.
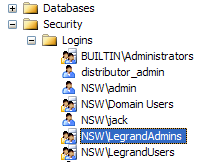
- Add the relevant Domain Users or Domain Groups to SQL Security.
- Unzip the Common Folder template in a shared network location.
- Install the Legrand CRM application on a desktop and define a connection to the SQL database.
- Log into Legrand CRM using the ‘demo’ account and specify the location of the Common Folder.
- Create new user login accounts and set the ‘demo’ login to ‘Inactive’.
- Set up User Roles and User Permissions.
- Optional: Install the Legrand Outlook Add-In and define the connection to the SQL database.
1. Restore the database in SQL Server Management Studio
Your SQL administrator should install and configure the Microsoft SQL server. If the SQL installation is poorly configured, you will encounter issues connecting the Legrand CRM application to the SQL database.
After you download either the demo database or blank database, unzip the file and then use SQL Server Management Studio to restore the database to your SQL server.
2. SQL Logins and Permissions
Legrand CRM uses Windows or SQL authentication to connect to the SQL Server. If you use Windows authentication, ensure that the appropriate Windows Domain Groups have been added as Login accounts to the SQL Server and have permission to access the CRM database. Moreover, ensure that users have the appropriate SQL permissions to access, read and write to the SQL database.
The recommended action is to create a ‘LegrandUsers’ Domain User Group that contains all the Domain Users that will access Legrand CRM but do not need to change the System Settings in Legrand CRM.
Access to the administration menu in Legrand CRM requires the execution of certain SQL functions that are usually restricted to the db_owner membership role and sysadmin server role. It is best to have a separate Domain Group, e.g., ‘LegrandAdmins’, for users requiring a sysadmin server role and db_owner role membership for the database.
3. Create a shared folder
A complete Legrand CRM database includes the database and a ‘Common Folder’. The folder stores files such as document attachments, email attachments, Word templates and e-templates. The folder is typically a network-sharing folder located on the server with full permissions for all Domain Groups or Domain Accounts to access the database. If you intend to have multiple Legrand CRM databases on the server, we recommend using the following path location:
\\servername\LegrandCommon\DBname
Alternatively, if you are the only person accessing data and intend to install Legrand CRM on your laptop or desktop, then the Common folder can be on your local drive. For example:
C:\LegandCommon\DBname
4.1 Install the Legrand CRM application
Go to our software updates page to download and install Legrand CRM. Scroll down and click on the download link.

In the Dropbox window, click ‘Download’ and run the installer.

Select ‘Browse’ to select a folder location and click ‘Next’ to proceed.
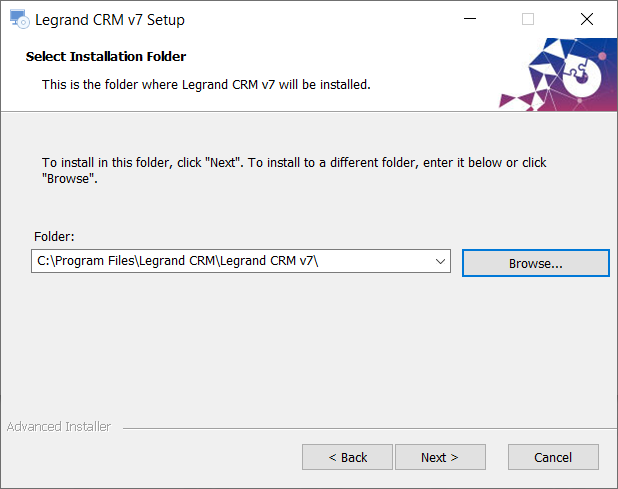
Click ‘Install’ to begin the installation.
NOTE: In some circumstances, you may need to install the application as a 32-bit application. Please refer to our v7.1.3 change log to determine if you need to run Legrand CRM as a 32-bit application.
If you require Legrand CRM to run as a 32-bit application, refer to this article to ensure you install and run it as a 32-bit.

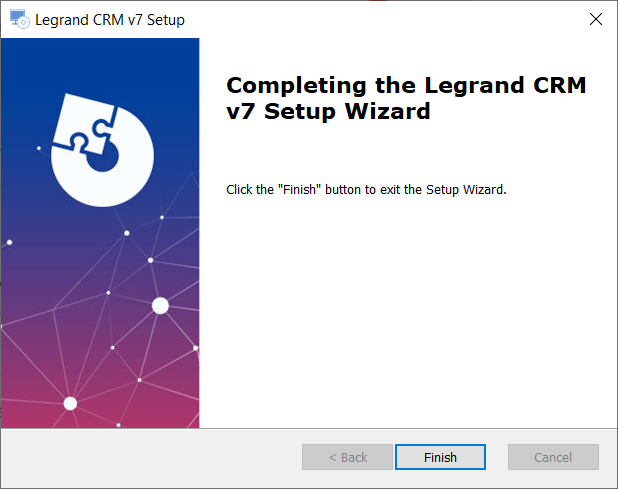
Once the installation is complete, click ‘Finish’ to exit.
4.2 Define a new connection to your database
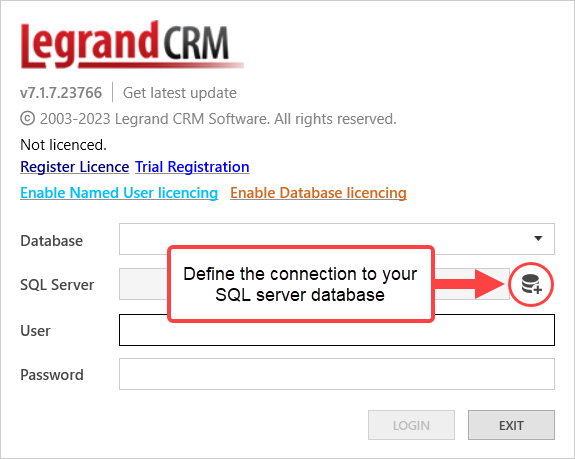
After you install Legrand CRM, launch the app and click the icon on the login screen to define a connection to your SQL server database.
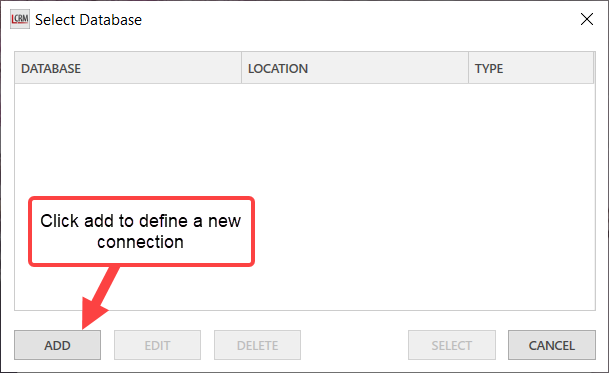
Click on ‘ADD’ to define a new connection.
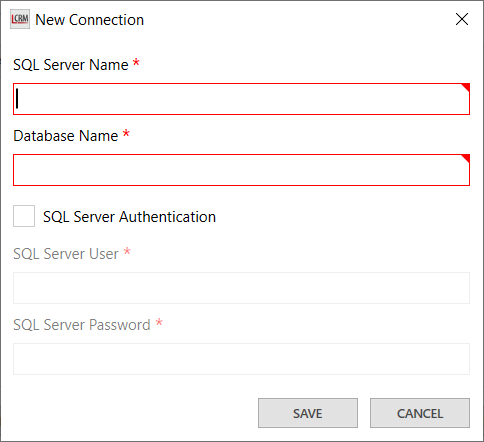
Enter the SQL Server Name and Database Name. If you use SQL Server Authentication, click the checkbox, enter your details and click ‘SAVE’.
5. Login and define the common folder location
The demo database has a ‘Demo’ user login with no password. The demo user is an ‘Administrator’ with full user permissions to configure the system. Use the demo user account to log in and create user roles for you and your team members. Once you create user logins and set up the User Roles and Permissions, you can set the Demo user login as ‘Inactive’.
Please refer to the guide ‘Manage User Accounts & Roles’ on how to set up new user accounts, assign roles and set user permissions in Legrand CRM.

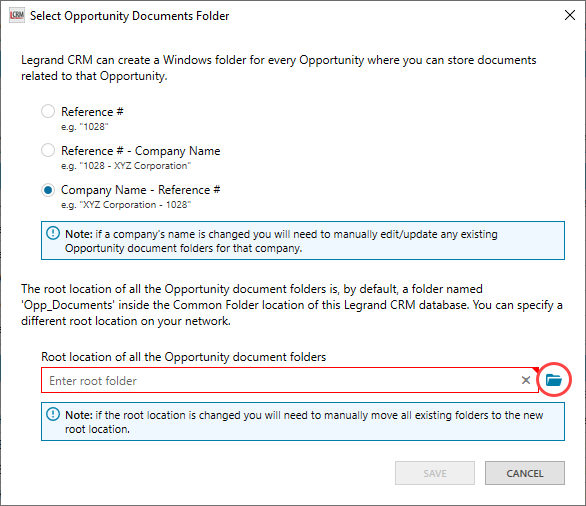
When you log in for the first time, Legrand CRM will ask you to define the path location for the Common Folder and Opportunity Documents.
If you do not have a folder for opportunity documents, you must create a new folder. The opportunity documents folder is typically a shared folder located on the server. However, it can be separate.

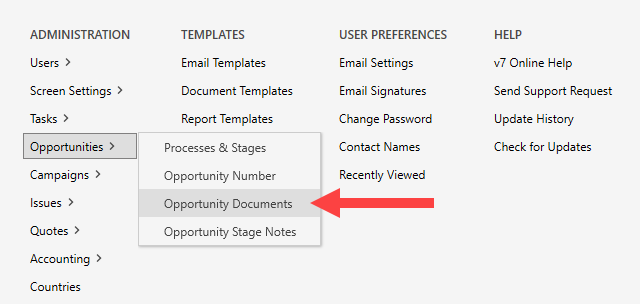
Go to the administration settings in Legrand CRM to define a path location for opportunity documents. Select Opportunities > Opportunity Documents.
Click on the blue folder icon to select the folder location and save
The following example is a path file location for opportunity documents:
\\servername\LegrandCommon\DatabaseName\OppDocs