Legrand CRM stores data on the server in two or, in some cases, three separate locations. Data is stored in a SQL database, a ‘shared folder’ and in some cases, a separate ‘opportunity documents’ folder. The ‘shared folder’ is a file that is shared on a server and is typically on the same server as the SQL. The ‘opportunity documents’ folder is also a share, and is often located below the shared folder. However, it can be located entirely separate. Before you migrate to a new server you will need the following information:
- The location of the Legrand CRM SQL Database.
- The existing Shared and Opportunity Documents folder locations.
- The new SQL server name (and possibly instance name).
- The new shared & opportunity document folder locations.
1. Database Migration
- Use the SQL Server Management Studio to create a backup of the Legrand CRM database on the existing SQL instance to a .bak file.
- After you created a backup file, make sure that the database is offline. This will prevent anyone accidentally updating it during the migration.
- Copy the .bak file to the new SQL Server and use it to perform a ‘database restore’ on the new instance.
2. Share & Opportunity Document Folder Migrations
- In the new server, create a new shared folder in the file system. The shared folder is typically called ‘LegrandCRMCommon’ but can be named however you want.
- Share the folder using a suitable share name and the same permissions as for the existing share.
- Copy the entire contents of the existing shared folder to the new server location. This can take a substantial period of time depending on the folder size.
- If necessary also copy and share the opportunity documents folder to the new location (if it’s below the shared folder this will not be necessary).
3. Link Desktop Clients To The New Location
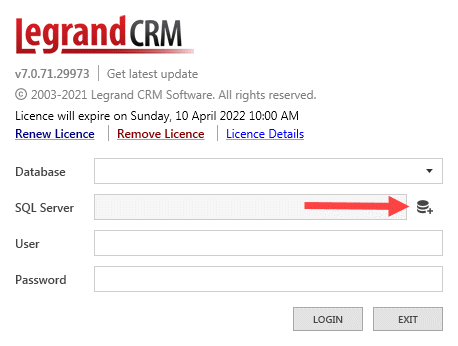
- Launch the Legrand CRM application and click on the database icon.
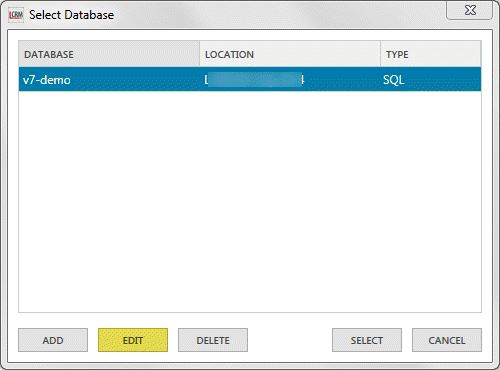
- In the ‘Select Database’ window, select your Legrand CRM database from the list (in most cases there will only be one option) then click ‘Edit’.
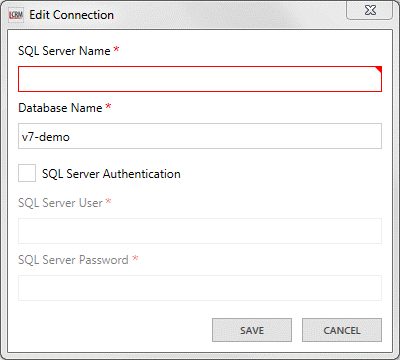
- In the ‘Edit Connection’ window, make changes as necessary; it is most likely that only the SQL Server Name will need to be changed. Once you set up the connection, log into Legrand CRM and define the new path file location for the Share folder and Opportunity Documents folder.
4. Define Shared Folder and Opportunity Documents file location
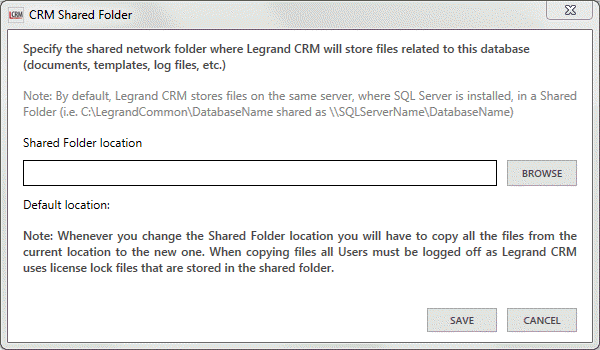
In Legrand CRM, go to the administration panel and click on ‘Data > Shared Folder’ to define the new path file location for the shared folder. Click ‘BROWSE’ to locate your new shared folder and save.
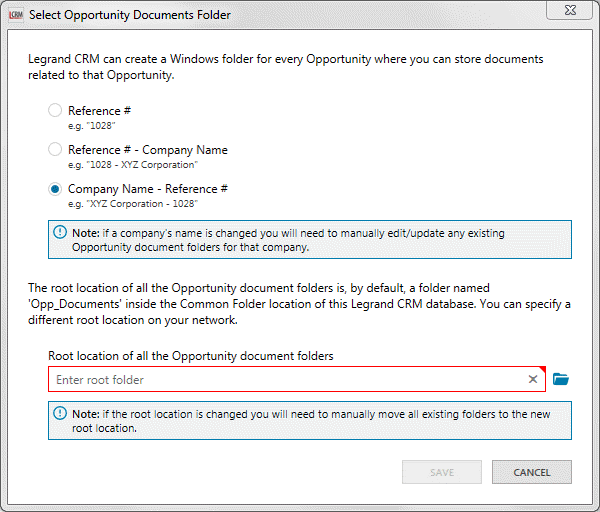
Once you define the share folder, go to the administration panel in Legrand CRM and select ‘Opportunities > Opportunity Documents’. Click on the folder icon and locate the new Opportunity Documents folder then save. You can now proceed to use Legrand CRM.