Legrand On-Premise CRM integrates with Constant Contact and MailChimp – global leaders in email marketing services. With our e-marketing integration, you can create targeted mailing lists in Legrand CRM and sync them to your chosen email provider. Once you execute the campaign, you can retrieve a campaign summary, view detailed results and follow up on leads in Legrand CRM.
NOTE: User roles & permissions
User Roles in Legrand CRM have specific permissions that allow you to access modules and perform certain functions. For example, you can give all team members access to the Campaigns module but restrict selected users’ ability to create a new campaign or manage campaign settings.
Go to the administration panel in Legrand CRM to set user roles and change permissions. Select User > User Accounts to assign user roles. Go to User > Manage Roles and click Change Role Permissions to change user role permissions.
Connect to your e-marketing provider account
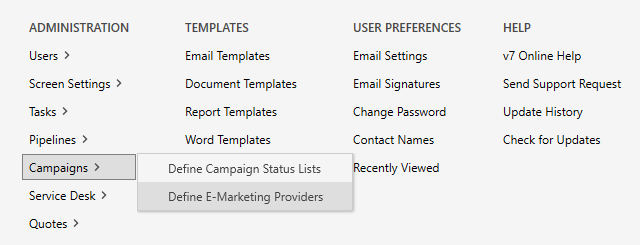
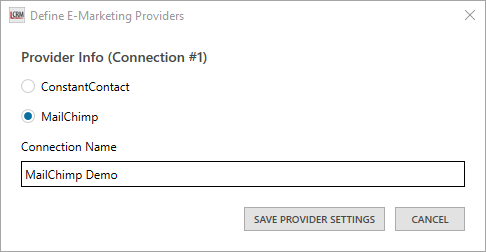
You can connect Legrand CRM to your e-marketing provider in the administration settings. Open the administration panel in Legrand CRM and select Campaigns > Define E-Marketing Providers.
Select your e-marketing provider and enter a connection name. Click ‘SAVE PROVIDER SETTINGS’ and continue.
NOTE: The Connection Name is any generic name.
The process will vary between MailChimp and Constant Contact. Click here to view a detailed guide on how to connect Legrand CRM MailChimp or here for Constant Contact.
Sync mailing lists to MailChimp or Constant Contact
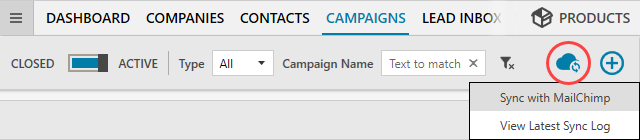
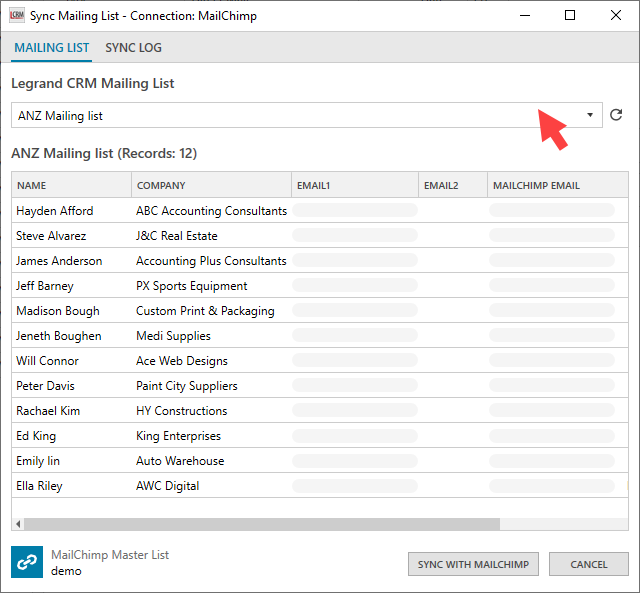
In Legrand CRM, you can segment contacts using tags to create targeted mailing lists and sync them to your e-marketing account. To sync your mailing list with your e-marketing account, go to the Campaigns module in Legrand CRM and click on the ‘Sync Mailing List’ icon.
Select your mailing list and click ‘SYNC WITH MAILCHIMP/CONSTANT CONTACT’.
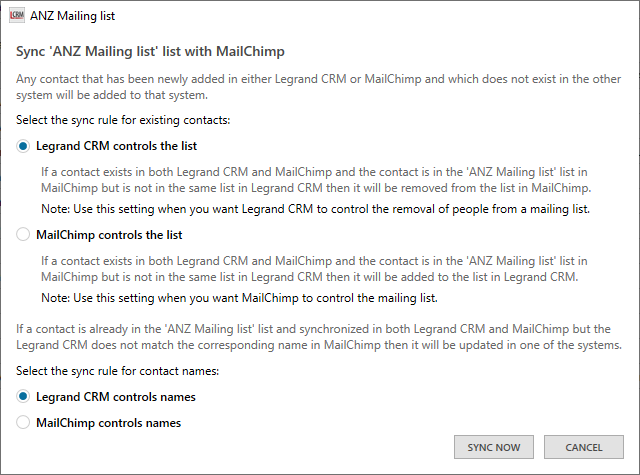
Specify the sync rules to decide whether Legrand CRM or your e-marketing provider controls the mailing list and contact names. Click ‘SYNC NOW’ once you select the sync rules.
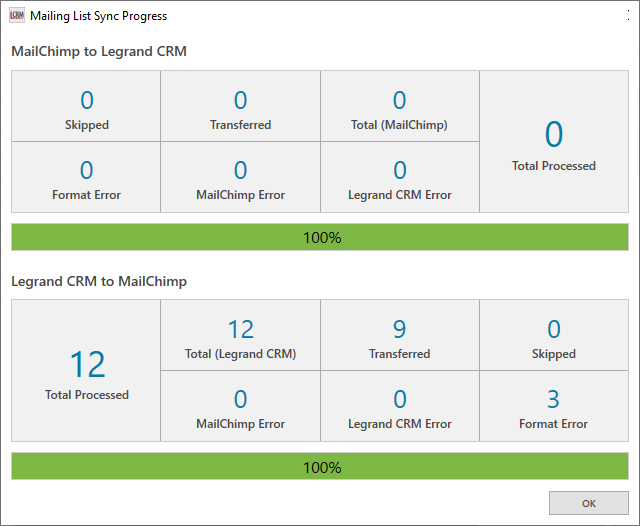
After the sync operation, you can see the number of transferred contacts, skipped contacts, and contacts with formatting errors and identify which program caused the error.
Sync logs & errors
The sync log provides additional information on the latest sync operation. You can use the sync log to identify the cause of any sync errors. For example, a format sync error could be an invalid email address.
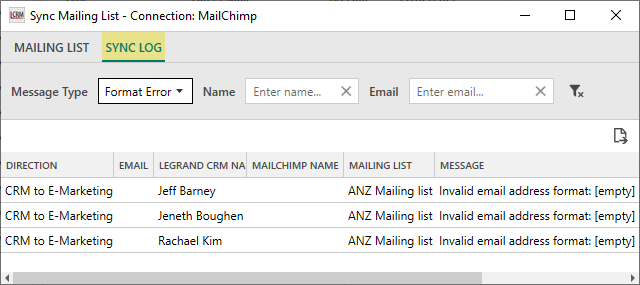
Go to the article ‘How to fix Sync Log Errors’ to find a detailed guide on sync logs and how to fix errors.
Download campaign results into Legrand CRM
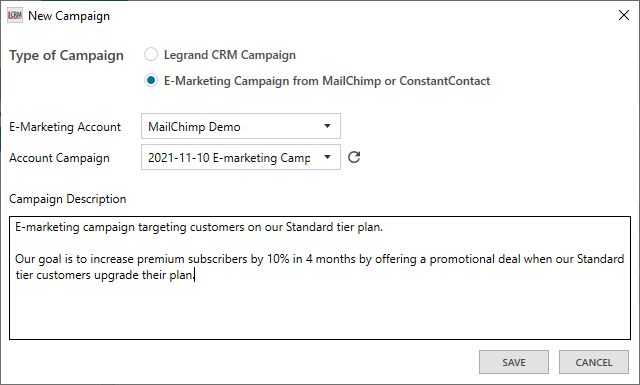
You can track the performance of your e-marketing campaigns in Legrand CRM. Go to the Campaigns module and click on the (+) icon to create a campaign record.

Select ‘E-marketing Campaign from MailChimp or ConstantContact’ and use the drop-down fields to select your e-marketing account and campaign. Enter a campaign description and click ‘SAVE’. The campaign description can include a summary of the campaign, your target audience and goals.
Once you create the record, click ‘Sync Summary’. You can view the number of emails sent, emails flagged as spam, contacts who opted out, open rate, click rate and bounce rate.

You can also see who clicked, opened, forward, bounced or unsubscribed in the ‘Targets and Leads’ section. Click ‘Sync Details’ to sync the campaign details into Legrand CRM.
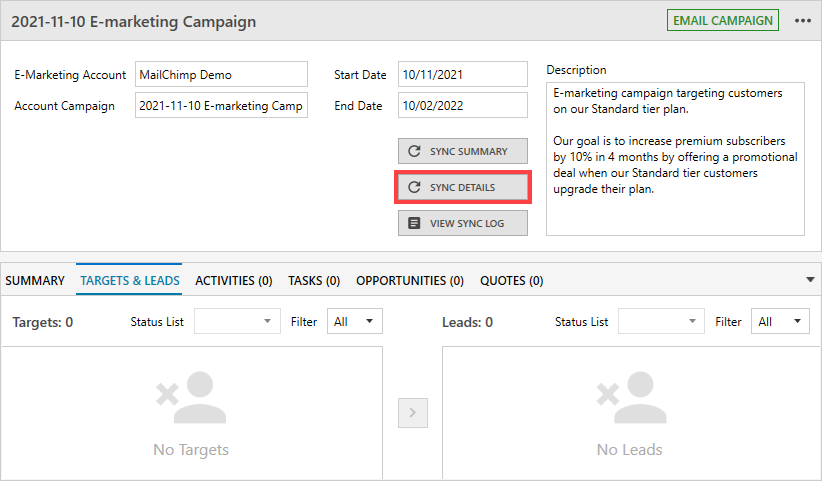
Click ‘SYNC CAMPAIGN DETAILS’.

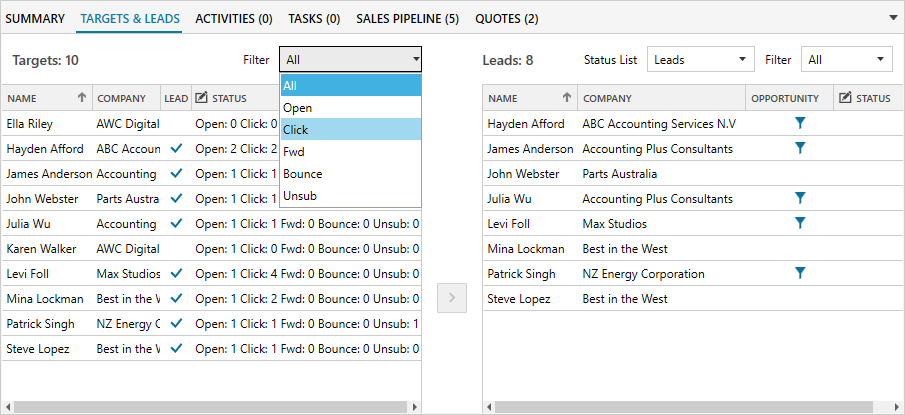
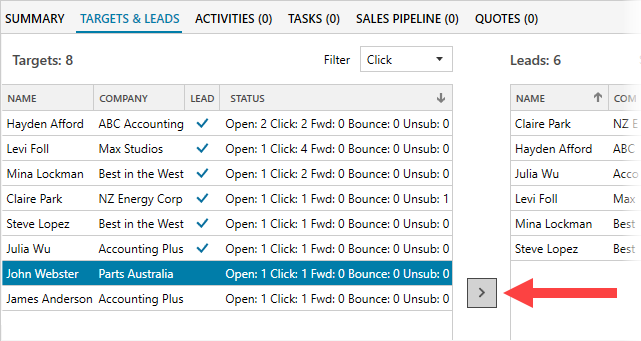
Once the sync operation is complete, go to the ‘Targets & Leads’ section. You can filter contacts to see who opened, clicked, forward, bounced or unsubscribed and sort leads into a separate list for further action.
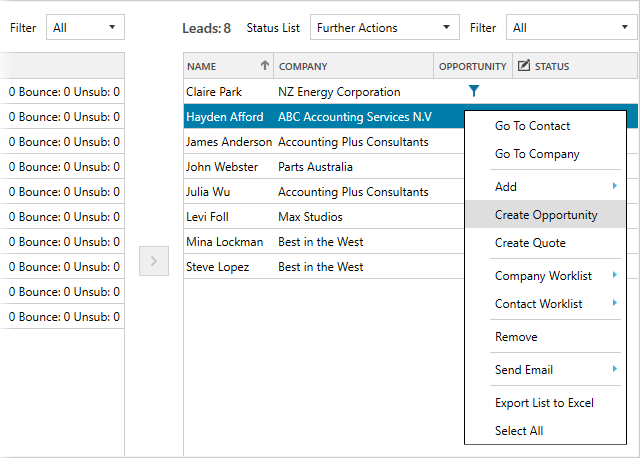
Manage campaign leads in Legrand CRM
Legrand CRM makes it easy for you to sort campaign leads and pass them on to your sales team. You can use the filter to sort campaign responses by open, click, forward, bounce or unsubscribe.
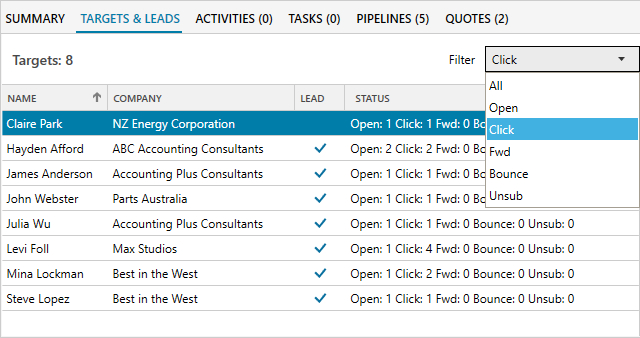
Once you identify a lead, select the contact and click on the right arrow icon to move it into the ‘Leads’ list.
NOTE: To bulk select, right-click on a target and click ‘Select All’
From the Leads list, you can send a follow-up email to the contact, record an activity note, create a task, schedule a calendar event, create an opportunity or send a direct quote.