In the Campaigns module, you can create a ‘Legrand CRM Campaign’ or download an ‘E-marketing Campaign from MailChimp or Constant Contact’. This article will cover how to manage Legrand CRM Campaigns.
Create a Legrand CRM Campaign
Go to the Campaigns module and click the ‘Add New Campaign’ icon.

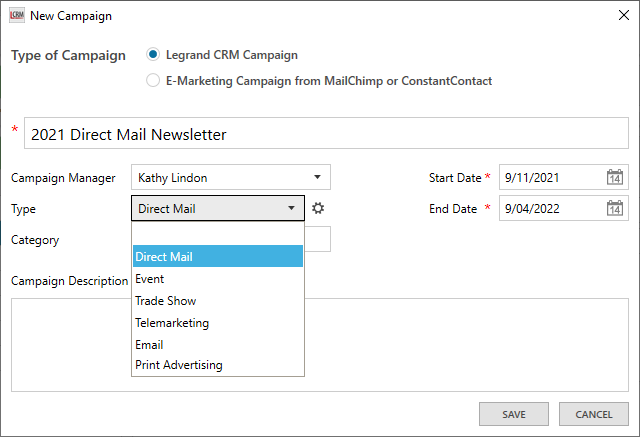
Select ‘Legrand CRM Campaign’ and type in the name of the campaign. Select a campaign manager and enter the campaign’s start and end date. Define the campaign’s type and specify the category.
Type: The type of marketing campaign. For example, direct mail, telemarketing, print advertising, trade show attendance etc. Click on the settings icon to edit the campaign types.
Category: The ‘Category’ field refers to the campaign’s purpose, such as a product launch, product update or company announcement. You could also use it to specify the product category if you sell more than one product or service. Note that you can change the name of the data field to suit your requirements.
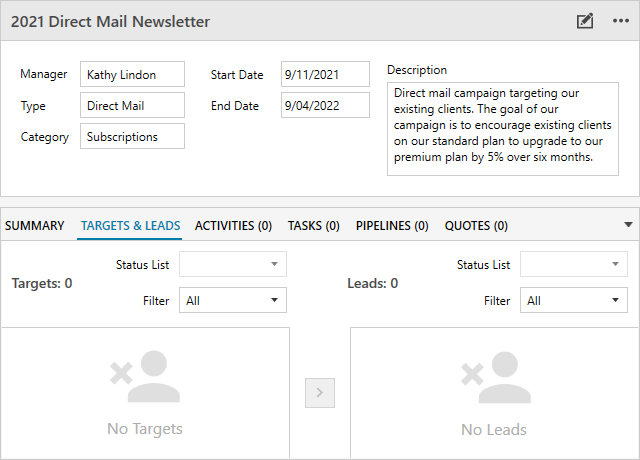
Enter a description of the campaign and click ‘SAVE’. You can include who the target audience is and the campaign goals.
Once you create a campaign, you can assign contacts from your CRM as ‘Targets’.
Assign Contacts as Targets
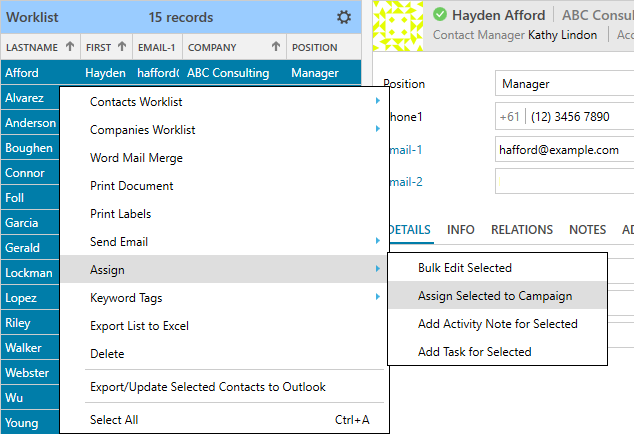
Targets refer to the target audience or contacts that receive the marketing message. Go to the Contacts module to assign contacts as your target audience. Select the contacts and right-click to open the menu. Select Assign > Assign Selected to Campaign.
NOTE: We recommend using the Contact Worklist or Keyword tags to create a contact list. After you create a list, you can assign the contacts to your campaign. Find out how to use Worklists here and how to use keywords to create a list here.
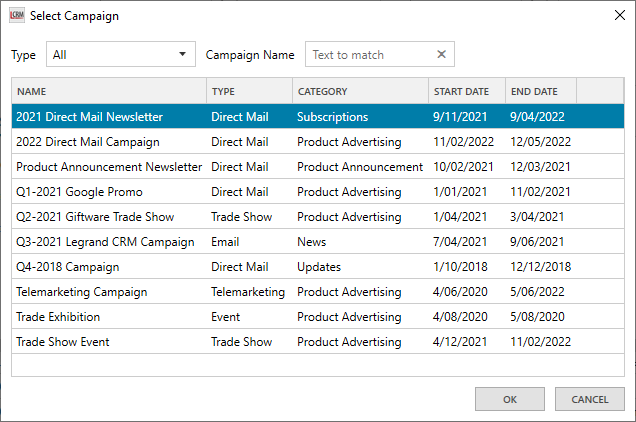
Select the campaign you created and click ‘OK’.
Record Targets’ response
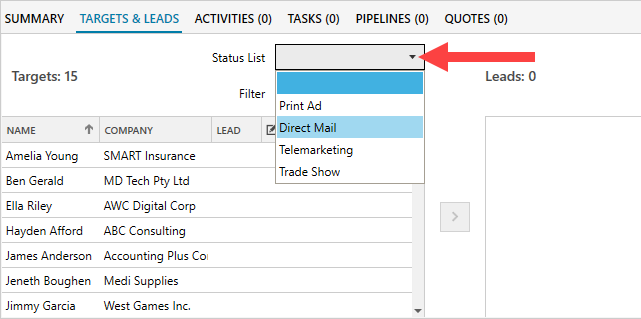
After you deliver the campaign, select a ‘Target Status List’ to record your targets’ responses. A ‘Target Status List’ consists of responses or status values. You can create multiple Status Lists and define the responses or status values for each list.
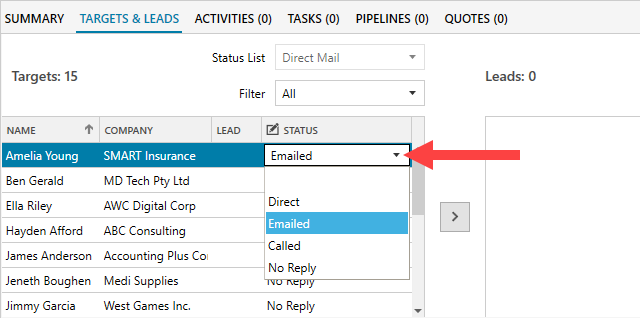
For example, the responses to a Direct Mail campaign can include:
- Direct: Sent mail back to the mailing address.
- Emailed: Sent an email to the address on the mail.
- Called: Called the number on the mail.
- No Reply: No response to the mail.
The responses to a Telemarketing campaign can include:
- Interested: The target received the call and is interested.
- Not Interested: The target received the call but is not interested.
- No Answer: Did not answer the call.
Use the drop-down field to record each target’s response or status.
Click here to find out more on how to configure the Status Lists.
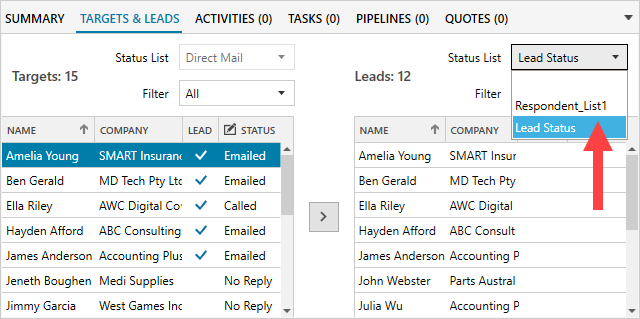
Sort Leads into the Leads List
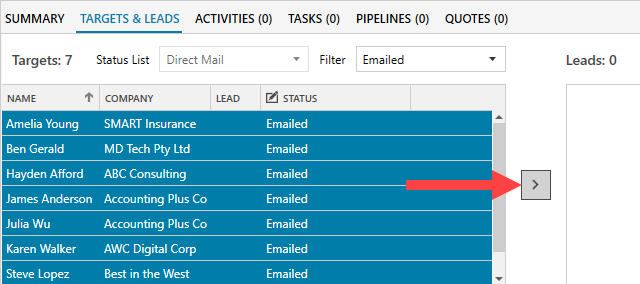
When you record all responses, use the filter to sort targets by their response.

Select the targets who responded and click on the arrow to move the targets into the Leads list.
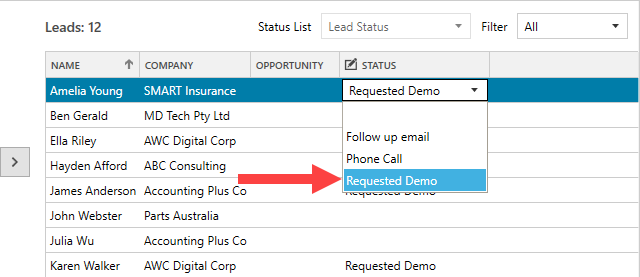
Record the Status of your Leads
Select the ‘Lead Status List’ to record the status of your leads.
Use the drop-down field to record each lead’s status. For example, requested product demo or requires a follow-up email, call etc.
Click here to find out more on how to configure the Status Lists.
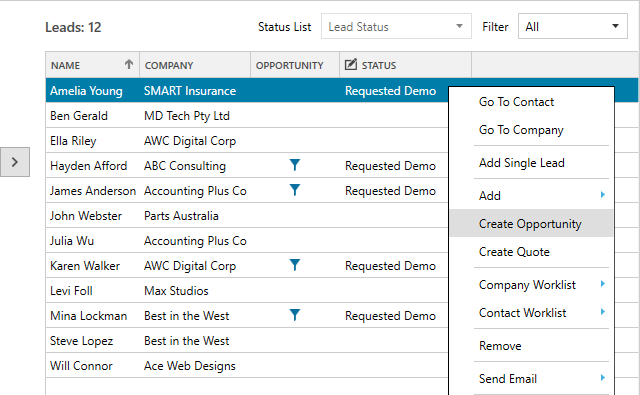
Follow-up on campaign Leads
Right-click on the lead to open a menu and perform the following CRM functions:
- Add an Activity Note, Task, or Calendar Event: Plan your next sales activity to convert leads into sales. For example, you can assign sales-related tasks to your team, schedule calendar events with contacts etc.
- Create Opportunity: Add leads to your pipeline for your sales team to qualify and nurture.
- Create Quote: You can create a quote and send it to the contact from the Campaigns module.
- Send Email: Send follow-up emails to your contacts. You can send a generic email or ‘Send Personalised Email’.