Standard data fields store basic information about your customers or prospects, such as a company name, contact name, phone number, email address etc. Legrand CRM provides additional fields you can use to create custom fields and capture relevant information.
How to define custom fields
Go to the administration settings and select Screen Settings > Configure Data Fields.

The data dictionary lists all the standard and additional fields you can configure in Legrand CRM. Use the drop-down field to select a module.
NOTE: Additional fields are limited in specific modules (e.g. Activities).

Locate a field and specify the control type. For example, a user field can be a text or a drop-down control type.
| Metaname | Control Type |
| MODULE.DATE | Date |
| MODULE.NUMBER | Number |
| MODULE.PERCENT | Percentage |
| MODULE.USER | Text or Drop-down |
| MOUDLE.YESNO | Checkbox |
Enter a name for the field in the ‘USER CAPTION’ column and save.

How to display custom fields
Go to the module where you defined the custom field.

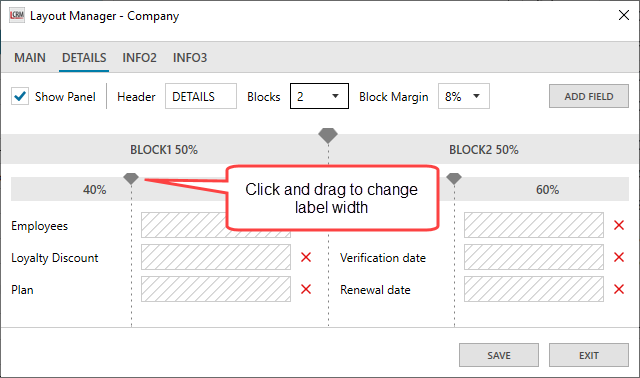
In the administration settings, select Screen Settings > Screen Layout.

- Select where to display the custom field (Header one, two, three or four). You can also edit the header name, select the number of blocks and specify the block margin.
- Click ‘ADD FIELD’.
- Select the custom field from the ‘Field Selection’ drop-down and click ‘ADD’.

Click and drag the icons to change the column or label width. You can also click and drag the field to rearrange the order.
Once you configure the screen layout, click ‘SAVE’ to apply the changes and exit.
You can now capture relevant information in the custom field.
