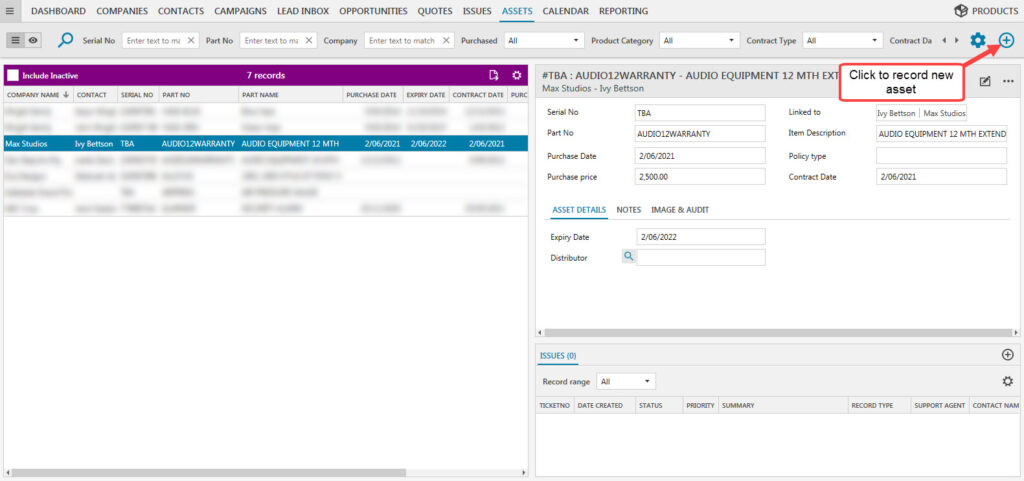
Items that have been sold by your company and used for your client’s business is displayed in the Assets module. To record a new asset, click on the icon in the top-right.
Then fill in the relevant fields:
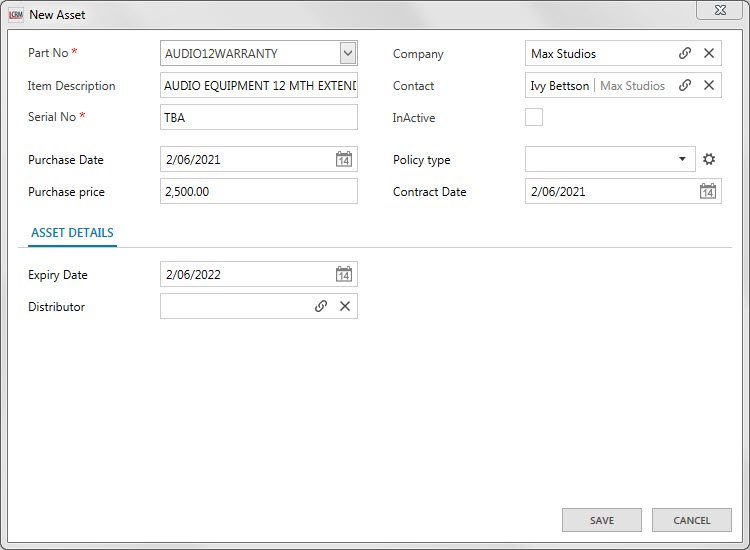
Part No: The Part No. is defined in the Products module. Simply use the drop-down list to find the item’s Part No.
Item Description: The Item Description is defined in the Products module.
Serial No: Type in the individual item’s unique ID to identify the asset.
Purchase Date: Select the date that the item was purchased.
Purchase Price: Type in the price the item was purchased for.
Company: Link the Company that has bought the item from your business.
Contact: Link the Company’s Contact. The item sold by your business may have an expiry date and requires a member of your team to contact the client to renew the item.
NOTE: The data fields in the detail information display on the right can be configured so that it is more relevant to your business needs. To configure the data fields and screen layout go to the administration panel in Legrand CRM. To add a new data field in the information display click on ‘Screen Settings > Screen Layout’. View our guide ‘Custom Screen Labels & Layout’ to find out more.
Asset Information
Legrand CRM enables you to add custom data fields to store additional information as shown. After you add new data fields, click on the notepad icon to edit and store additional information. After you record information in the new data fields click ‘SAVE’.

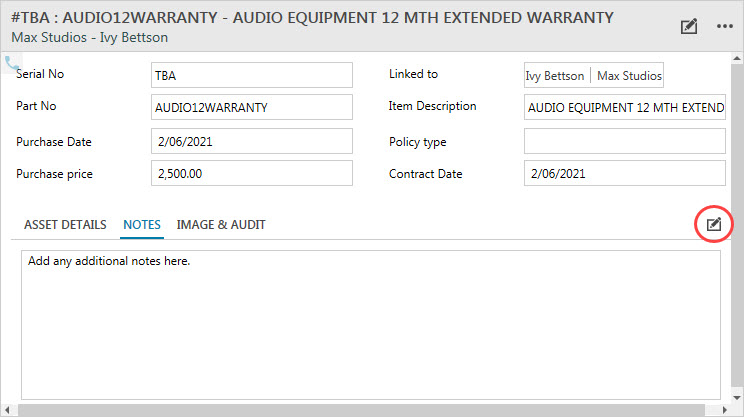
In the ‘Notes’ tab, simply click on the notepad icon to store information with the section. Type in any relevant notes then click ‘SAVE’.
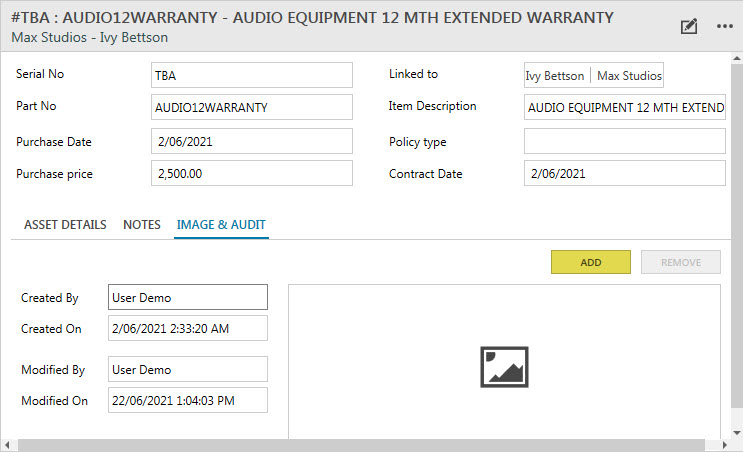
In the ‘IMAGE & AUDIT’ tab, you can add or remove images of the asset. Click ‘ADD’ and select an image from your computer to upload the image. Alternatively, click ‘REMOVE’ to delete the image.
Note: To configure the data fields and screen layout go to the administration panel in Legrand CRM. To add a new data field in the information display click on ‘Screen Settings > Screen Layout’. View our guide ‘Custom Screen Labels & Layout’ to find a detailed guide on how to configure the data fields and screen layout.