Legrand CRM enables you to configure the Calendar settings to suit your needs and preferences. To change the calendar settings click on the icon as shown in the demonstration. In the ‘Calendar Settings’ window, you can make changes to the following:
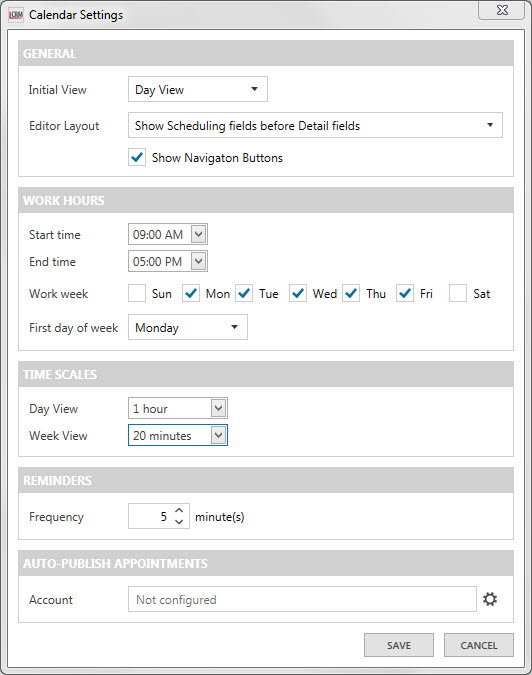
General: Use the drop-down list to change the default calendar view or choose whether you want to display Scheduling fields or Detail fields first. Click the checkbox if you want to show navigation buttons in Legrand CRM’s Calendar.
Work Hours: Decide the Start time and End time for your day. Click the check boxes to configure the days in the work week. E.g. A user may work on Monday, Tuesday and Wednesday. You can also decide what the first day of the week is for your calendar.
Time Scales: Configure the screen layout of the calendar timeline. E.g. If the time scale is 20 minutes, there will be three rows between each hour to represent 20 minutes each.
Reminders: Set reminders for your appointments to keep on track and manage your tasks. Type in a number or use the arrows to change the frequency of the reminders. E.g. A user can set the frequency of reminders to every 10 minutes.
Auto-Publish Appointments: Link your Microsoft Outlook to sync your appointments from both Outlook and Legrand CRM. To link your Microsoft account click on the settings icon then click the checkbox enable and OK. If you are already logged into Microsoft Outlook, Legrand CRM will automatically find your account when you click ‘enable’.